Being a DigiKey application engineer is one of the best jobs an electrical engineer could have. We are constantly exposed to new technology and encouraged to construct in-house training and document the result in articles, blogs, and videos for the public.
Lifelong learning isn’t just a saying, it’s a way of life.
Introduction to the Industrial Control Breadboard
Industrial control technology is a growing field for DigiKey. To better understand the technology, we all need to spend some time at the workbench.
Traditional electronics prototypes are constructed using a small breadboard featuring 0.1-inch component spacing. That doesn’t work for industrial components, as most are designed for installation on a DIN rail. What we needed was an industrial breadboard; something versatile, rugged, and low cost.
One solution is the Phase Dock trainer as shown in Figure 1.
Let’s explore the history of this design.
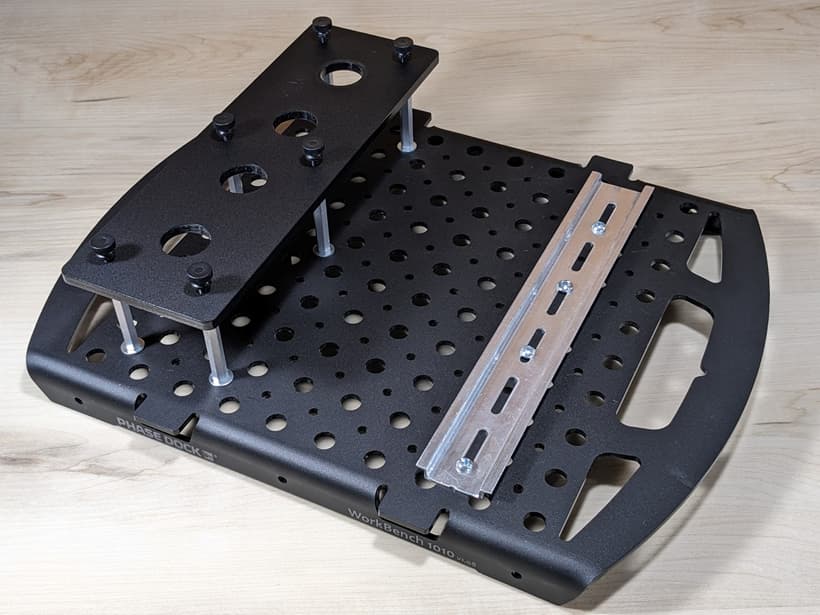
Figure 1: Image of the Phase Dock trainer with supporting hardware (sold separately).
Where to Purchase the Trainer
The trainer and associated components are best described in this article exploring the Arduino Opta PLC. There you will find a parts list as well as other links describing how to assemble the parts. Many components are universal such as the DIN rail, circuit breaker, pilot devices, and Weidmüller power distribution block
Industrial Trainer Specifications
I’d like to tell you that the product emerged as a fully formed idea implemented in a single pass. But that’s not how most things work. Instead, there were many iterations and refinements.
The original designs were based on Phase Dock 10-10 platform that was readily available in the DigiKey lab. These platforms were designed for students as a rigid mounting platform for microcontroller projects. The major selling point is that the wires will remain in place when the student’s project is transported. The robust aspects carry over when a DIN rail is installed on the base.
The switch plate for the 22 mm pushbuttons and panel indicators took longer to develop. I cut the first version out of aluminum. This worked very well, but it didn’t scale, as it takes time to cut and punch the holes. Later, I discovered that DigiKey technicians had untapped talent. A day after the conversation, I had a 3D printed part on my desk. After a week I had the first laser cut switch plate.
At this point, we had our industrial breadboard. We gained experience as it was featured in several TechForum articles. The final step was to return to Phase Dock and request that the switch plate be added to the 10-10 base. Before moving on, I should mention the nylon thumb screws. Originally, I had used screws and was considering adding magnets for quick release of the switch plate. In conversation, one of the partners suggested nylon thumb screw. This was a very good idea as they are inexpensive and add an attractive feature to the trainer.
Trainer Applications
Part of my DigiKey tasking is to provide technology demonstrations and document the results in the TechForum. This trainer has been featured in many articles. Some examples include the safety relay as shown in Figures 2 and 3.
-
A Schneider Electric safety relay is evaluated in Figure 2. The primary focus is the relay-to-emergency stop connection. A secondary focus is the Schneider motor starter and the E-T-A solid-state circuit breaker
-
A Siemens LOGO! PLC is evaluated in Figure 3. The primary focus is the LOGO! PLC with its integral HMI. The 4-position (22 mm) switch plate can accommodate a variety of field devices ranging from pushbuttons to variable resistors, and even ultrasonic sensors.

Figure 2: The trainer is used to evaluate a Schneider safety relay.

Figure 3: The trainer is used for experiments featuring the Siemens LOGO! PLC.
Academic Use of the Trainer
The industrial breadboard is a natural fit for students. The best part is that students get to wire real-world components. This provides a natural way to discover the interaction between components with room to learn from mistakes. While the DIN rail size is limited to 9-inches, there are thousands of supported experiments. As an example, consider Figure 4 featuring MIKROE interface boards allowing an Arduino Minima (hidden in the card stack) to operate as a PLC with a 24 VDC interface.
The teamwork extends to other entities including Arduino. The trainer as configured in Figure 4 is featured in the Arduino Academy’s Opta ACE 100 course.

Figure 4: Trainer used to explore PLC elements based on MIKROE Click board on an Arduino Minima.
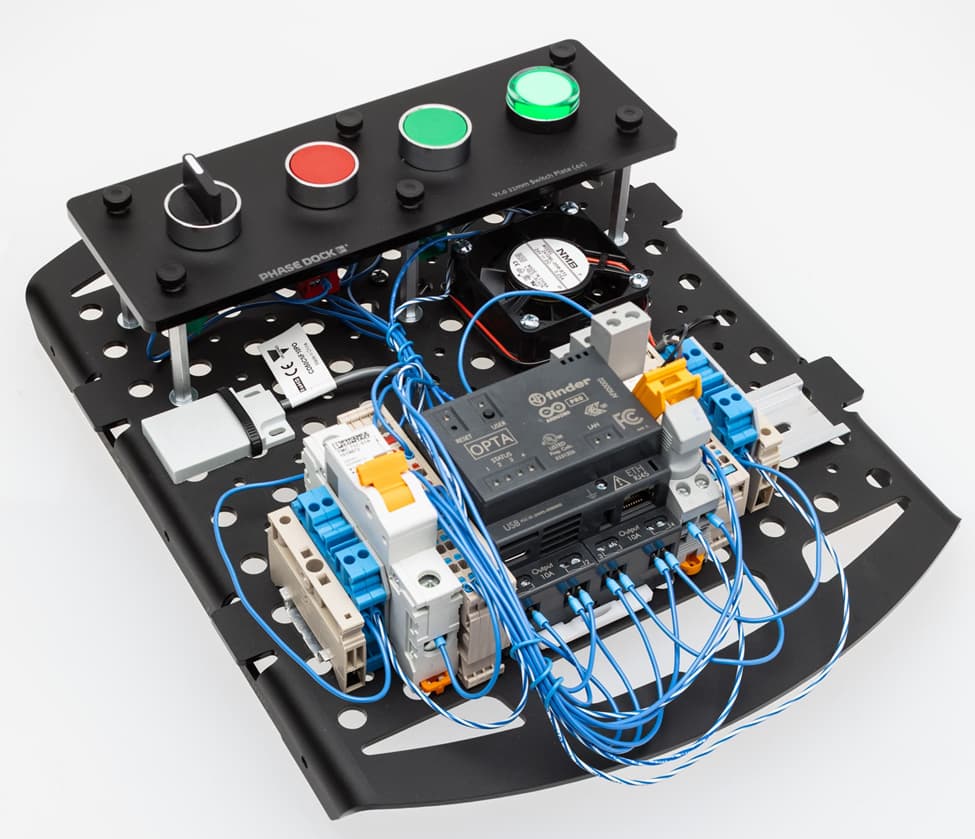
Figure 5: Arduino Opta kit featuring the Phase Dock trainer platform.
Parting Thoughts
The trainer is the result of teamwork. The result is right-sized learning platform suitable for self-discovery or for rigorous classroom study. You can quickly learn about new or unusual components or host a complete industrial course starting with relays and ending at networked PLC.
It’s been a fun development cycle working with many people across the industry. I thank each of you who have contributed to the design.
Best Wishes,
Aaron
Related Articles by This Author
If you enjoyed this article, you may also find these related articles helpful:
About This Author
Aaron Dahlen, LCDR USCG (Ret.), serves as an application engineer at DigiKey. He has a unique electronics and automation foundation built over a 27-year military career as a technician and engineer which was further enhanced by 12 years of teaching (interwoven). With an MSEE degree from Minnesota State University, Mankato, Dahlen has taught in an ABET-accredited EE program, served as the program coordinator for an EET program, and taught component-level repair to military electronics technicians. Dahlen has returned to his Northern Minnesota home and thoroughly enjoys researching and writing articles such as this.