Hi
I’m looking to replace an Opto Coupler which I suspect is not firing any more. It’s in an old Oberheim synthesizer called the Matrix1000, circa late 80’s-mid 90’s. The original was made by Sharp(labeled PC900) and probably obsolete, so I’m trying to source a compatible replacement. I’m including a photo of the actual part in my synth, and another photo of the part by itself. I’ve seen several potential lookalikes but can’t really make heads or tails of ‘spec similarity’ or compatibility. Thanks in advance for any help!
Without knowing more about the circuit design I can’t narrow down a replacement any further than this:
https://www.digikey.com/short/9zmz2rp8
For in stock parts the list drops to these 5 choices:
https://www.digikey.com/short/83hfbd2f
Given the nature of optocouplers, I think there is little risk of damaging the rest of the circuit if you try any of these parts as a replacement.
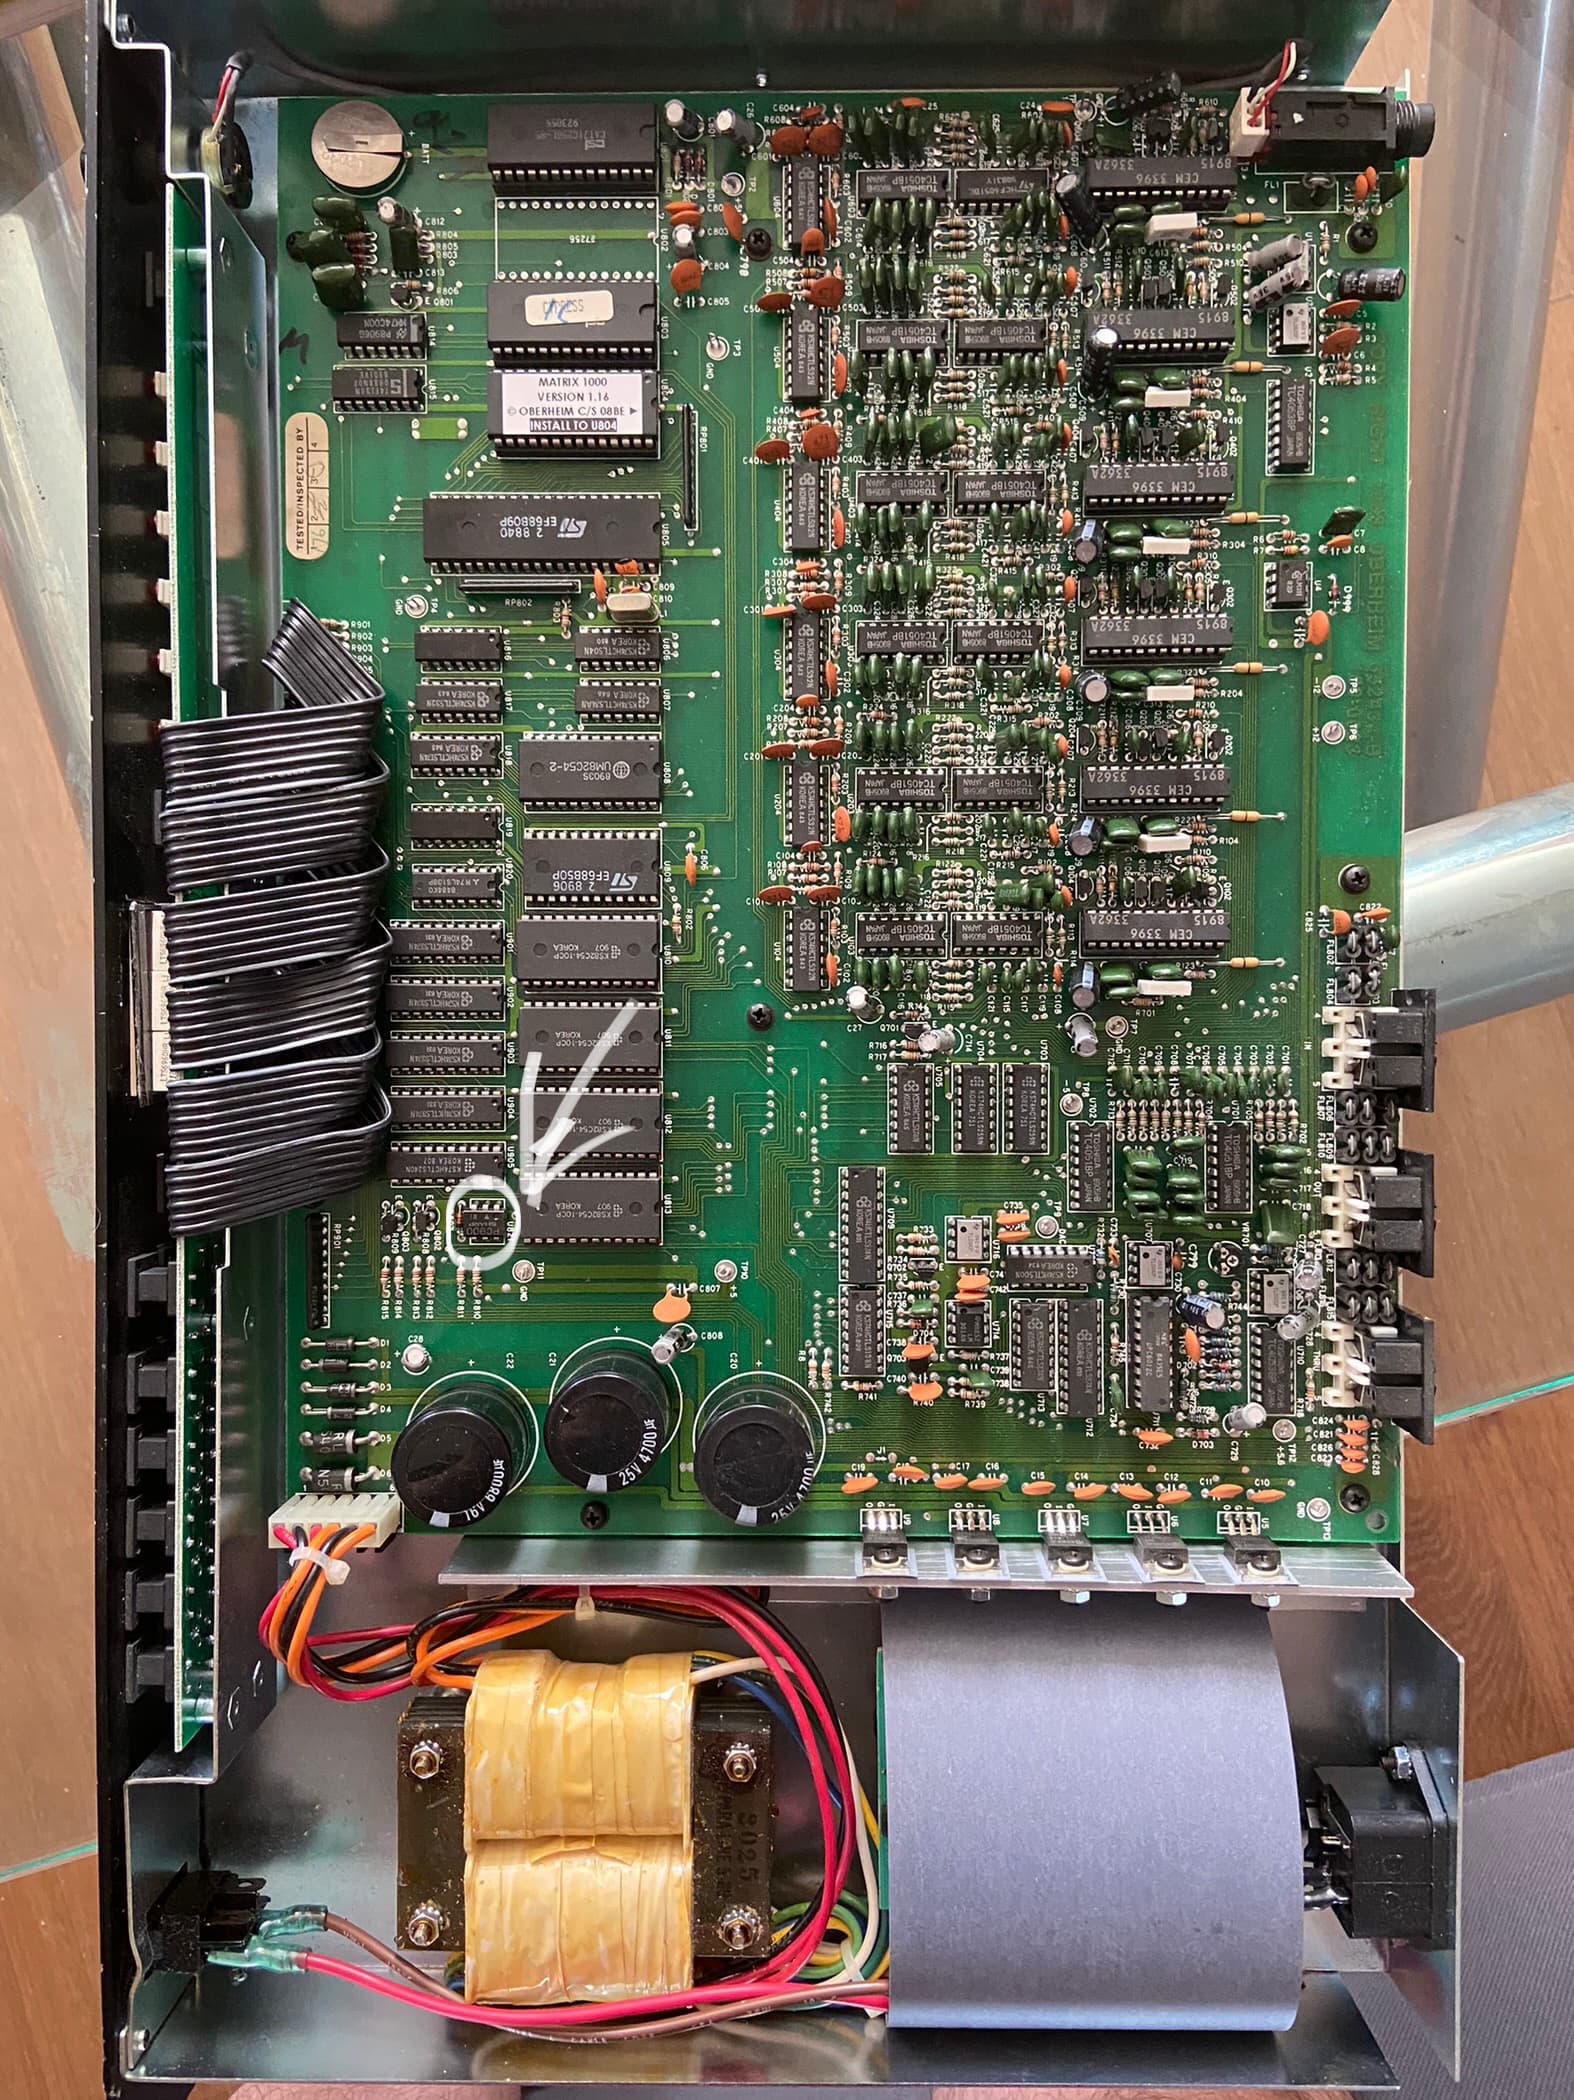
Thanks for the input!! Here’s a photo of the entire board…maybe it can clear up the issue and narrow the search?
image|374x500
I searched for and found the schematic:
Unfortunately whoever scanned their copy did a poor job and the edges of the pages are missing. Fortunately the optocoupler circuit is not on an edge (see last page).
BTW - they were created using OrCAD SDT, I recognize the title block since I created many designs with that schematic capture program in the early 90’s.
Based on my reading of the circuit and limited knowledge of MIDI protocols, I believe any of the 5 choices will work for this repair. Certainly using any of them will not cause any further damage to this rather valuable vintage synth (current price used is about double the new price in 1989).
Thanks so much for all this info. It’s a great sounding synth, but has some common failings, and the optocoupler often goes out. Is it possible to piggyback a new one on top of the old one and avoid needing to take the board out, remove, and re-solder with the new one? Obviously I’ve had no experience doing this and someone told me that so long as the legs are touching and it’s oriented correctly, the piggyback trick works.
It depends on the failure mode of the optocoupler, a piggyback repair should work for the most common failure mode, a blown LED in the optocoupler. In any case it won’t hurt to try the piggyback method first, if it doesn’t work then pull it out.
or …
With sufficient soldering/de-soldering skills, and the right tools, the part can be completely replaced without disassembly of the chassis/PCB.
- Cut the legs at the plastic package of the optocoupler with tiny cutters.
- Using tweezers hold a pin, heat the joint and pull out the pin. The pin may need to be wiggled and tugged if it’s bent over on the other side of the PCB
- Repeat for the other five pins.
- Use a solder sucker to clean out the holes.
- Install the new optocoupler and solder the pins from the top side.
2 Likes
Thanks again for all the tips👍

